
Using the Metadata Column page, you will be able to create and manage the metadata columns in your Reserves instance.
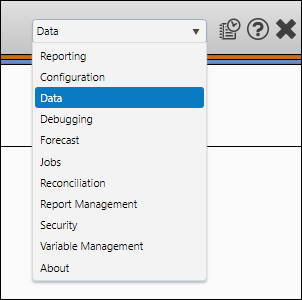
- Select Data from the Navigation Toolbar.
- Click on the Metadata tab, and then the Metadata Column page.
Create a Metadata Column
Follow these steps to create a new metadata column:
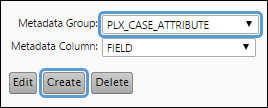
- Select the metadata group within which you want to create your column using the Metadata Group drop-down menu.
- Click the Create button.
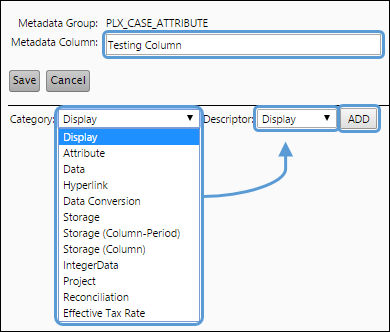
- Enter a unique name for your new column in the Metadata Column field.
- Add descriptors to your column:
- Select a category from the Category drop-down menu.
- Select a descriptor from the Descriptor drop-down menu.
- Click the ADD button to add the descriptor to your column.
- Some descriptors will include options that will need to be set up to function properly.
- Repeat this process to add any additional descriptors you require.
Different categories are linked to different descriptors. - After you have added all the required descriptors for your column, click the Save button.
Click image to expand or minimize.
Edit a Metadata Column
To edit an existing metadata column, follow these steps:
- Select the metadata group that contains the column you wish to edit using the Metadata Group drop-down menu.
- Select the metadata column you wish to edit using the Metadata Column drop-down menu and click the Edit button.
- Modify your column as you would when creating it. You will be able to:
- Add and remove descriptors.
- Modify the column's descriptors.
To remove a descriptor, click the X button to the right of the descriptor you wish to remove. - When you have finished making changes to your metadata column, click the Save button to save your changes.
Delete a Metadata Column
To edit an existing metadata column, follow these steps:
- Select the metadata group that contains the column you wish to delete using the Metadata Group drop-down menu.
- Select the metadata column you wish to delete using the Metadata Column drop-down menu and click the Delete button.
- You will be prompted to confirm the deletion. Click OK to delete the column.
Set up Attribute Editor Hyperlinks
Object-sensitive hyperlinks can be included in the Attribute Editor. Two example hyperlinks will be set up in this section:
- A fixed object-sensitive link: The URL for this link is stored as an attribute value in your Reserves database.
- A complex object-sensitive link: Attribute values from one or more columns in your database are added to the URL.
Example 1: Fixed Object-Sensitive Links
The simplest kind of link you can set up is used to open URLs that are stored as attribute values. In this example, shareable links to OneDrive folders were added to the attribute editor.
Click image to expand or minimize.
Setting up Fixed Links
Creating a list of fixed links only requires a single database column. The column you select can be used to store:
- The base link
- The parameter name
- URLs
In this example, all of the metadata changes were made to the PROJECT_DOCS column.
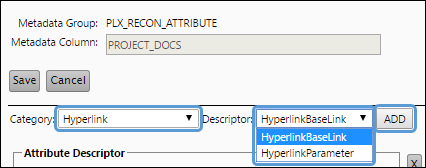
- After accessing the Metadata Column page, select the column you wish to modify (the PROJECT_DOCS column in this example) and click the Edit button.
- Add the HyperlinkBaseLink and HyperlinkParameter descriptors to the column.
- Select Hyperlink using the Category drop-down menu.
- Select HyperlinkBaseLink using the Descriptor drop-down menu.
- Click the Add button.
- Select HyperlinkParameter using the Descriptor drop-down menu.
- Click the Add button.
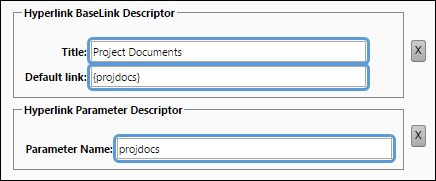
- Enter a parameter name in the Parameter Name field. This should match the name you used in your Default link.
- Enter a descriptive name for your URL in the Title field. When users click the hyperlink icon in the Attribute Editor, this name will be used to select your hyperlink.
- Add your URL to the Default link field.
- The value you enter in the Parameter Name field should match the value between the curly braces in the Default link field.
- When you have finished modifying your column, click the Save button.
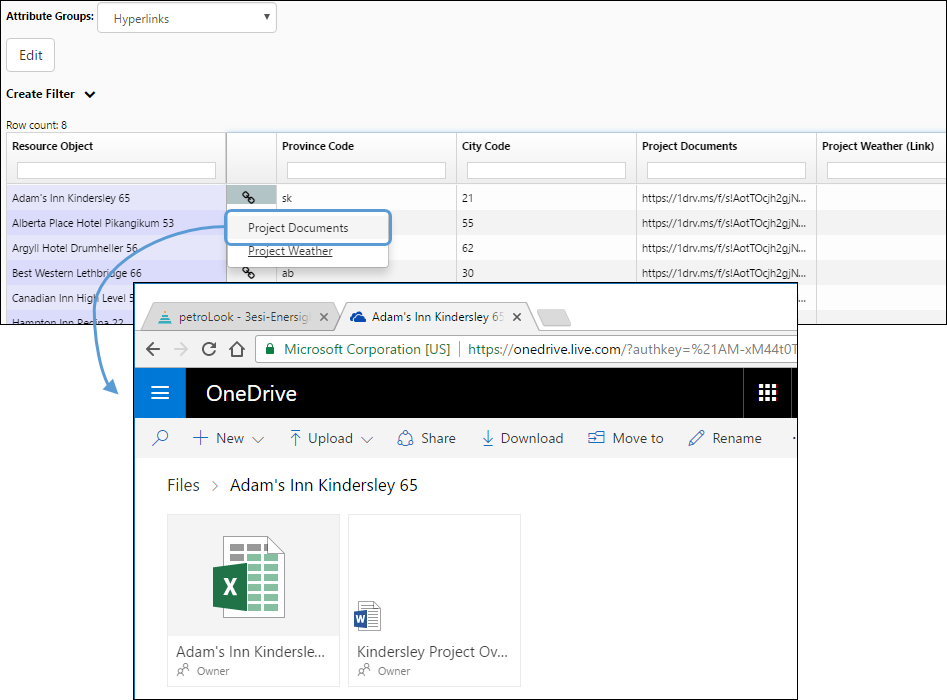
Example 2: Complex Object-Sensitive Hyperlinks
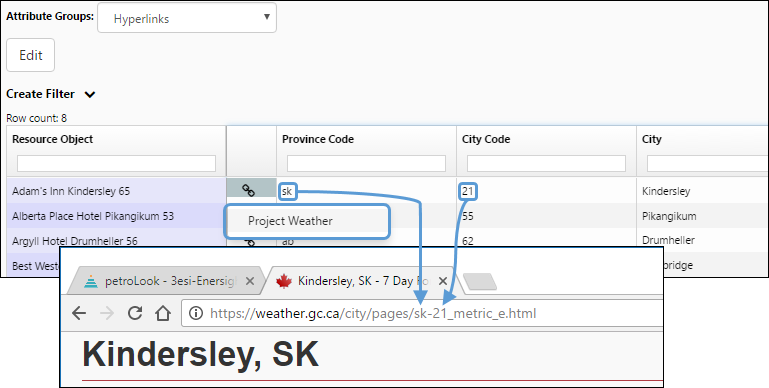
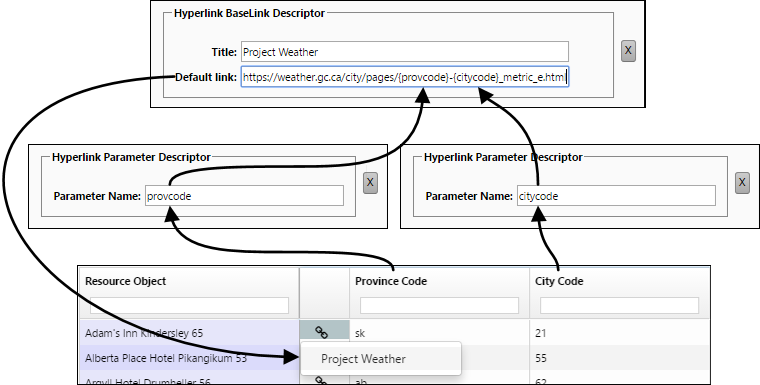
In the example below, an object-sensitive link option was added to the editor that allows users to check the weather in the closest Canadian city to each project. In this example, the Province Code and City Code values for each object are added to the hyperlink — when a user selects the link next to the Kindersley project, the province code for Saskatchewan (sk) and the city code for Kindersley (21) are added to the URL.
Click image to expand or minimize.
Setting up More Complex Hyperlinks
In this section, the metadata changes required to support the Project Weather hyperlink (above) will be described in detail.
First, the base URL in this example is as follows: https://weather.gc.ca/city/pages/sk-21_metric_e.html.
Three columns were added to Reserves's database to support this example:
- CITY: This column was used to store the base link.
- PROVINCE_CODE: This column was used to save province codes.
- CITY_CODE: This column was used to save city codes.
CITY
First, the column used for the base link was set up using The Metadata Column Page.
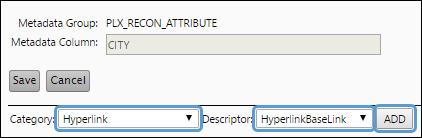
- After accessing the Metadata Column page, select the column you wish to modify (the CITY column in this example) and click the Edit button.
- Add the HyperlinkBaseLink descriptor to the column.
- Select Hyperlink using the Category drop-down menu.
- Select HyperlinkBaseLink using the Descriptor drop-down menu.
- Click the Add button.
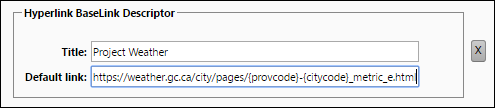
- Enter a descriptive name for your URL in the Title field. When users click the hyperlink icon in the Attribute Editor, this name will be used to select your hyperlink.
- Setup your hyperlink in the Default link field. https://weather.gc.ca/city/pages/{provcode}-{citycode}_metric_e.html was used in this example.
- In this example, two object-specific values will be added to each URL:
- {provcode}: Values entered in the Province Code column of the editor will be added to this part of the default URL.
- {citycode}: Values entered in the City Code column of the editor will be added to this part of the default URL.
- Once you've made the appropriate changes to your column, click the Save button.
PROVINCE_CODE and CITY_CODE
Now that the base link has been set up, metadata for the values that need to be added to the URLs need to be set up.
- After accessing the Metadata Column page, select the column you wish to modify (the PROVINCE_CODE or CITY_CODE columns in this example) and click the Edit button.
- Add the HyperlinkParameter descriptor to the column.
- Select Hyperlink using the Category drop-down menu.
- Select HyperlinkParameter using the Descriptor drop-down menu.
- Click the Add button.
- Enter a parameter name in the Parameter Name field. This should match the name you used in your Default link.
- When you have finished modifying your column, click the Save button.
- Repeat these steps to add the HyperlinkParameter descriptor to any additional columns you require for your hyperlinks (the CITY_CODE column in this example).


Summary
Each one of the descriptors required for this example are listed below:
Click image to expand or minimize.